Drop in one inherited photo and see what Phossil reads from it.
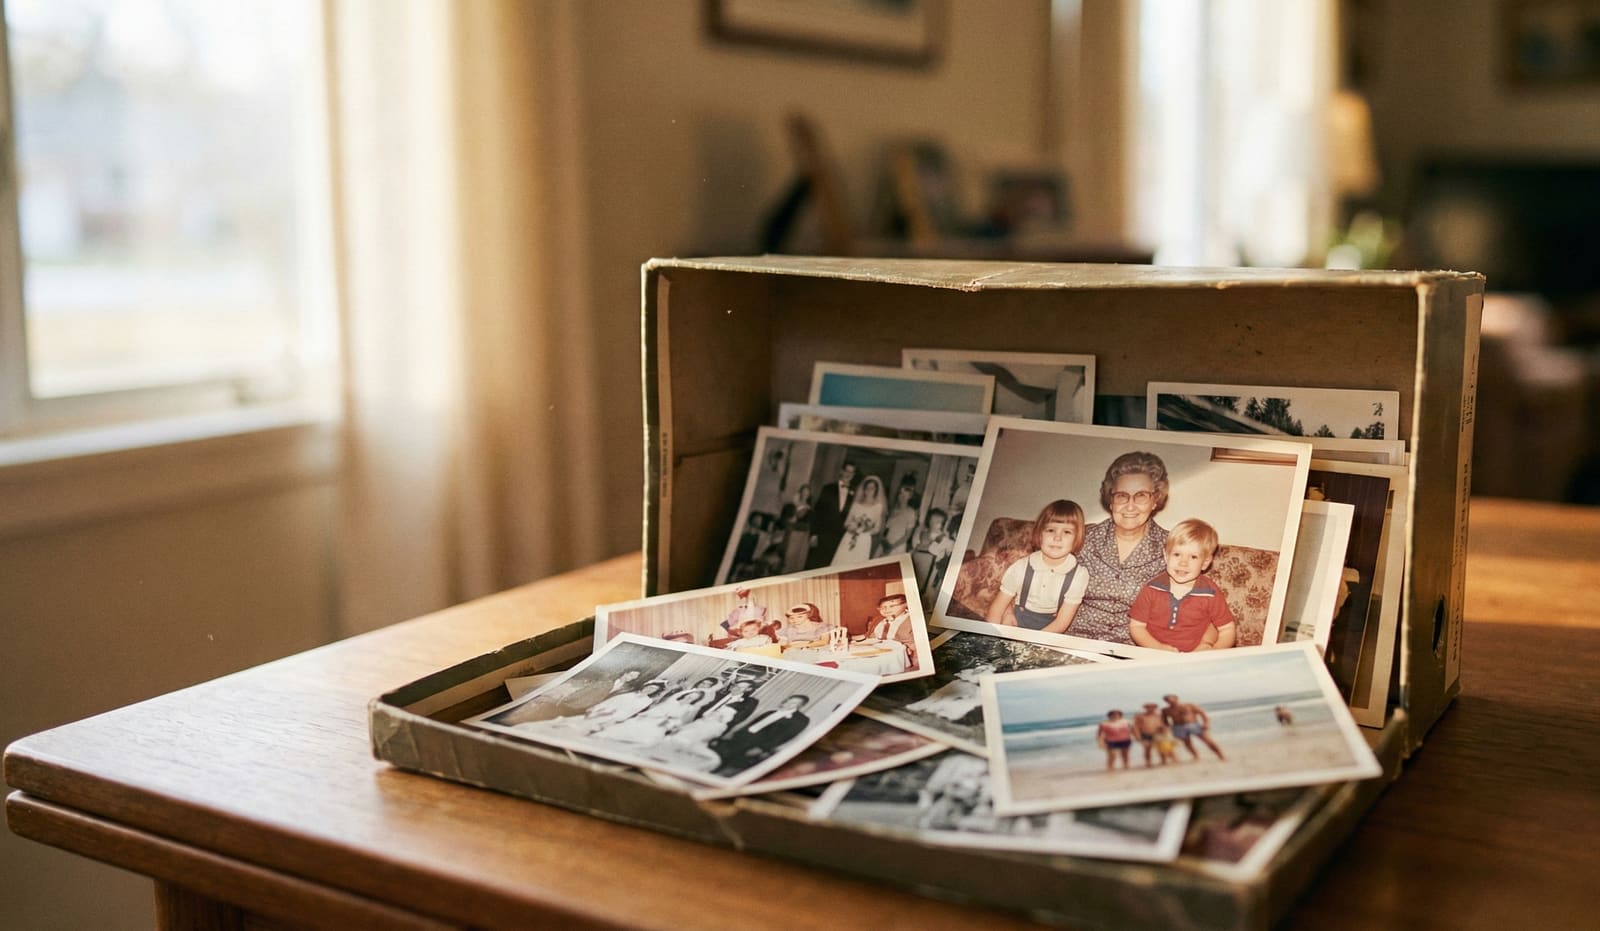
You've just inherited boxes of family photos. Maybe your parent passed away. Maybe you're cleaning out a childhood home. Maybe a relative handed you a shoebox and said "you're the one who cares about this stuff."
Now you're staring at hundreds, maybe thousands, of photographs you don't know what to do with.
Yes, it's daunting. But this guide, and new tools that didn't exist a few years ago, have changed the game. What once took months of manual sorting can now be done in a fraction of the time.
This guide will walk you through exactly what to do, step by step.
Before You Do Anything: The Two Rules
Rule 1: Don't throw anything away yet.
Even photos that look damaged, faded, or unrecognizable can often be restored. Even photos of people you don't recognize might be identifiable by an older relative. Even duplicates might be the only copy another family member has.
Set aside a "not sure" pile. You can make decisions later. You cannot undo a trash bag.
Rule 2: Don't write on the photos.
It's tempting to flip photos over and write names on the back. Resist this urge. Ink can bleed through. Pencil can smudge. Pressure can damage the image.
Instead, use sticky notes placed near (not on) photos, or keep a separate notebook with descriptions. If you must write on a photo, use a soft pencil on the back edge only, with minimal pressure.
Step 1: Gather Everything in One Place
Photos hide. Before you start organizing, do a thorough sweep:
- Shoeboxes in closets
- Photo albums (check inside the covers for loose prints)
- Picture frames around the house
- Wallets and purses
- Books (photos are often used as bookmarks)
- Filing cabinets
- Attics and basements
- Envelopes marked "photos" or with developer logos
- Old luggage and storage containers
- Desk drawers
- Behind other framed pictures
You will find photos in places that make no sense. That's normal. The goal is to get everything into one location so you can see what you're working with.
Step 2: Do a Rough Sort by Era
Don't try to organize everything perfectly on your first pass. Instead, create broad time-based piles:
- Very old (black and white, formal portraits, roughly pre-1950)
- Mid-century (color starts appearing, 1950s-1970s)
- Recent decades (1980s-2000s, the peak of consumer film photography)
- Unknown (can't tell when it's from)
You can estimate eras by looking at:
- Photo format (cabinet cards and tintypes are pre-1920, square prints are often 1960s-70s, 4x6 prints are 1980s onward)
- Clothing and hairstyles
- Cars, furniture, and backgrounds
- Image quality and color characteristics
- Border styles (white borders, rounded corners, etc.)
This rough sort helps you prioritize. Very old photos are often irreplaceable and should be handled with extra care. Recent photos might have duplicates or negatives somewhere.
Step 3: Identify the People You Recognize
Go through each pile and identify who you can. Don't worry about people you don't recognize yet.
For each photo, note:
- Who is in it (if known)
- Approximate date or age of subjects
- Location (if recognizable)
- Event or occasion (if known)
Keep these notes in a spreadsheet, notebook, or even voice memos on your phone. The format doesn't matter as long as you can find the information later.
Common identification clues
- Handwriting on the back (check carefully, it's often faded)
- Context from surrounding photos in the same envelope or album
- Background details (houses, cars, landmarks)
- Clothing that matches other dated photos
- Physical resemblance to known relatives
What about the truly mysterious ones?
Every inherited collection has them - photos with zero context. No writing on the back, no one alive who recognizes the faces.
The New Standard: The Phossil Method
Most AI dating tools look at one thing - usually faces and fashion. The Phossil Method uses Bayesian temporal inference to analyze everything in the frame simultaneously:
- Multi-signal fusion: Paper texture, clothing, objects, faces, even handwriting, combined into a unified probability estimate
- Works beyond portraits: Dates scenery, vehicles, architecture, storefronts, and document photos
- Dates the photos other tools refuse: 1990s and 2000s color prints and phone snapshots, not just pre-1990 portraits
- Dated ranges: a range with a confidence band, never a false exact year, and you can correct any guess in one tap
Try it free: Upload your first 100 photos and watch the Phossil Method date them automatically. No credit card required.
Step 4: Interview Living Relatives
This is the most valuable and most time-sensitive step. The people who can identify faces and tell stories are aging. Their knowledge exists nowhere else.
How to do this well
- Select 20-30 photos spanning different eras, prioritizing ones with unidentified people
- Visit or video call an older relative
- Go through photos one at a time, asking open-ended questions
- Record the conversation (with permission) so you can reference it later
- Take notes on names, relationships, dates, locations, and any stories they share
Questions to ask
- "Do you recognize anyone in this photo?"
- "When do you think this was taken?"
- "Where was this?"
- "What was the occasion?"
- "What do you remember about this person?"
- "Who else might know more about this?"
Important: Do this sooner rather than later. Memories fade. People pass away. The stories that give photos meaning can be lost forever.
A minimum viable approach
If you're overwhelmed by the full project but have elderly relatives, consider this: digitize just 20 representative photos, run them through an AI dating tool to get approximate decades, then schedule one 30-minute call with your oldest relative. Showing photos on a screen (rather than handing over prints) often unlocks more memories. Having a rough year estimate gives them a starting point ("Was this the 1960s?") which reduces "I don't remember" responses.
That single session often yields more context than months of solo detective work.
Step 5: Decide on a Digitization Strategy
Physical photos degrade. They're vulnerable to fire, flood, humidity, light exposure, and simple handling. Digitizing your collection creates a backup that can be shared, restored, and preserved indefinitely.
You have three main options:
Option A: DIY Scanning
Best for: Smaller collections (under 500 photos), people with patience, those who want maximum control.
What you need:
- A flatbed scanner (Epson Perfection series is popular, around $200-400)
- Scanning software (often included with scanner)
- Storage solution (external hard drive and/or cloud backup)
Recommended settings:
- 300 DPI for standard prints you'll view on screen
- 600 DPI for prints you might reprint or enlarge
- Save as TIFF for archival quality, JPEG for sharing
- Scan in color even if the photo is black and white (captures more detail)
Pros: Lowest cost per photo, full control over quality, you see every image.
Cons: Extremely time-consuming. Expect 1-2 minutes per photo including handling. A 1,000 photo collection could take 20-30 hours of active work.
Option B: Professional Scanning Service
Best for: Large collections, people short on time, those who want consistent quality.
How it works: You mail your photos to a scanning company. They scan everything and return originals plus digital files on a drive or via download.
Popular services:
- ScanMyPhotos
- ScanCafe
- GoPhoto
- Legacybox
- Foreverized (by Phossil)
- Local photo labs (often higher quality, more expensive)
Typical pricing: $0.20-0.50 per photo for standard scanning. Higher for slides, negatives, or oversized prints. Bulk discounts often available.
Pros: Saves enormous time, professional equipment, handles various formats.
Cons: Cost adds up for large collections ($200-500+ for 1,000 photos). Your photos leave your possession for weeks. Quality varies by provider.
Deciding between a mail-in box and scanning at home? We put the two side by side: Phossil vs Legacybox.
Questions to ask any service:
- What DPI do you scan at?
- Do you return originals?
- How are photos tracked and secured?
- What's the turnaround time?
- Do you handle damaged photos?
Option C: AI-Assisted Organization
Best for: People who want more than just scans, those who value organization and searchability, families who want to explore their photo history together.
A newer category of tools combines scanning with artificial intelligence to automatically identify faces, estimate dates, and organize photos into a searchable collection. This goes beyond simple digitization to create an organized family archive.
What AI tools can do:
- Face grouping: When offered, group photos by person on your device, even across different ages. (Availability varies by region and account.)
- Date estimation: Analyze clothing, hairstyles, photo format, and other clues to estimate when undated photos were taken.
- Semantic search: Search for "beach" or "birthday party" and find matching photos without manual tagging.
- Relationship mapping: See which family members appear together most often.
- Timeline generation: Automatically create a chronological story of your family's history.
Examples of what's available:
- Mylio offers face recognition, calendar views, and syncs across devices. Designed primarily for photographers managing their own libraries. (~$20/month)
- MyHeritage PhotoDater estimates when historical photos were taken (1860-1990) with roughly 60% accuracy within five years. Free feature within the MyHeritage genealogy platform.
- Google Photos provides free face recognition and search, but lacks family structure and treats photos as flat collections.
- Phossil combines all of the above into a unified family archive: face grouping (on-device, when offered), date estimation, semantic search, living portraits, relationship graphs, and geographic mapping. Built specifically for inherited photo collections.
Pros: Reduces manual organization work dramatically, creates searchable collections, can identify the same person across different ages, surfaces forgotten photos and connections.
Cons: Requires some initial setup and review, AI isn't perfect and needs human verification, newer category with fewer established players.
Step 6: Create an Organization System
Whether digital or physical, your photos need a structure you can navigate.
A note on tools: If your collection is under 50 photos with good metadata, a spreadsheet and folder structure works fine. Where AI organization tools earn their keep is when you're staring at 800 unlabeled photos and need to establish a preliminary timeline before you can even start asking relatives the right questions.
For Digital Photos
Folder structure option:
File naming convention:
YYYY-MM_Description_People.jpg
Example: 1965-06_Wedding_Rose-John.jpg
For photos with unknown dates, use UNKNOWN_Description_People.jpg or estimate a decade: 1970s_Birthday_Rose.jpg
Metadata: Most photo software lets you add tags, descriptions, and dates to image files. This information travels with the file and makes searching easier.
For Physical Photos
If you're keeping physical photos (and you should keep at least some originals), store them properly:
- Use acid-free boxes and folders
- Store in a cool, dry place with stable temperature
- Avoid attics (temperature swings) and basements (humidity)
- Keep away from direct sunlight
- Handle with clean, dry hands or cotton gloves
- Never use rubber bands, paper clips, or adhesive
Archival storage supplies:
- Gaylord Archival
- Hollinger Metal Edge
- University Products
- Many local craft stores carry acid-free options
Step 7: Back Up Everything
The point of digitization is preservation. That only works if your digital files are backed up.
The 3-2-1 rule:
- 3 copies of your data
- 2 different storage types (e.g., hard drive + cloud)
- 1 copy offsite (not in your home)
Practical implementation:
- Primary copy on your computer
- Backup on an external hard drive (keep at home)
- Cloud backup (Google Drive, Dropbox, iCloud, Backblaze, or specialized photo storage)
Cloud storage options:
- Google Photos: Free up to 15GB, then $2-10/month
- iCloud: Free up to 5GB, then $1-10/month
- Amazon Photos: Unlimited photo storage with Prime membership
- Backblaze: $7/month for unlimited computer backup
- Phossil: Beyond storage - AI-powered organization, date estimation, on-device face grouping (coming soon), and Living Portraits that bring ancestors to life. Free tier available, see pricing.
Step 8: Share With Family
Preserved photos that nobody sees aren't really preserved. They're just stored.
Ways to share:
- Create a shared album on Google Photos, iCloud, or Amazon Photos
- Send prints to relatives who would appreciate them
- Create a photo book for a family reunion or holiday
- Frame and display meaningful photos
- Record video calls where you share photos and discuss memories
- Build a family website or private social media group
Who might want copies:
- Siblings and cousins
- Children and grandchildren
- Relatives you've lost touch with
- Family historians and genealogists in your family
- Local historical societies (for photos of historical interest)
Step 9: Handle the Emotional Weight
Sorting through inherited photos is emotional work. You'll encounter:
- Grief, seeing people you've lost
- Joy, rediscovering forgotten moments
- Confusion, not recognizing people or places
- Guilt, feeling pressure to preserve everything
- Overwhelm, facing the sheer volume
It's okay to:
- Take breaks when it gets heavy
- Ask for help from siblings or other family members
- Not keep every single photo
- Spend more time on photos that matter most to you
- Feel whatever you feel
It's not okay to:
- Rush through and throw things away you might regret
- Pressure yourself to finish quickly
- Hoard everything out of guilt without ever looking at it
The goal isn't to preserve every photo ever taken. The goal is to preserve and share the photos that tell your family's story.
Common questions
Damaged photos can often be restored, either by professional restoration services or AI-powered tools. Before throwing away a damaged photo, consider:
- Is this the only copy?
- Is the person recognizable?
- Is the damage repairable?
For valuable photos with significant damage, professional restoration runs $25-150+ per image. For less critical photos, AI restoration tools can improve image quality for a few dollars or less.
Negatives and slides often contain higher quality images than prints made from them. They're worth scanning, though they require different equipment.
- Slides: Need a slide scanner or adapter for flatbed scanners
- Negatives: Can be scanned on many flatbed scanners with transparency units
Professional services typically charge more for slides and negatives, but the quality is often worth it.
Generally, yes, at least for the most important ones. Digital files can be corrupted, formats can become obsolete, and services can shut down. Physical photos, stored properly, have lasted over a century and can last many more.
That said, you don't have to keep everything. Keep:
- Unique or very old photos
- Photos with historical significance
- Photos with sentimental value
- A representative sample from each era
Consider letting go of:
- Exact duplicates (keep the best quality copy)
- Severely damaged photos that have been restored digitally
- Photos of scenery with no people or context
- Photos that mean nothing to anyone in the family
This is common, especially with older photos. Options:
- Post to genealogy forums with any identifying information
- Use reverse image search to find similar photos
- Compare to photos where people are identified
- Accept that some faces will remain unknown
Unknown photos still have value. They show clothing, settings, and moments from your family's past, even if specific identities are lost.
Honest answer: longer than you think. A collection of 1,000 photos might take:
- Gathering: 2-4 hours
- Rough sorting: 1-2 hours
- Identification: 5-10 hours
- Interviewing relatives: 2-4 hours
- Digitization: 20-40 hours (DIY) or $200-500 (service)
- Organization: 3-5 hours
- Backup setup: 1-2 hours
Total: 35-65 hours of active work spread across weeks or months.
This isn't a weekend project. It's a meaningful undertaking that can take a year or more to complete properly. That's okay. Work at a sustainable pace.
For a deeper look at the time and cost tradeoffs, see our Economics of Photo Organization research.
Getting Started Today
If you're feeling overwhelmed, here's what to do right now:
- Find one box of photos. Not all of them. Just one.
- Set a timer for 30 minutes.
- Sort that box into piles: Very old, mid-century, recent, unknown.
- Stop when the timer goes off.
That's it. You've started. Tomorrow, do another 30 minutes. Progress compounds.
The photos in that shoebox survived decades. They survived moves, floods, fires, neglect. They made it to you. Now you get to decide what happens next.
Make them easy to find. Make them safe. Make them shareable.
That's how the memories live on.